
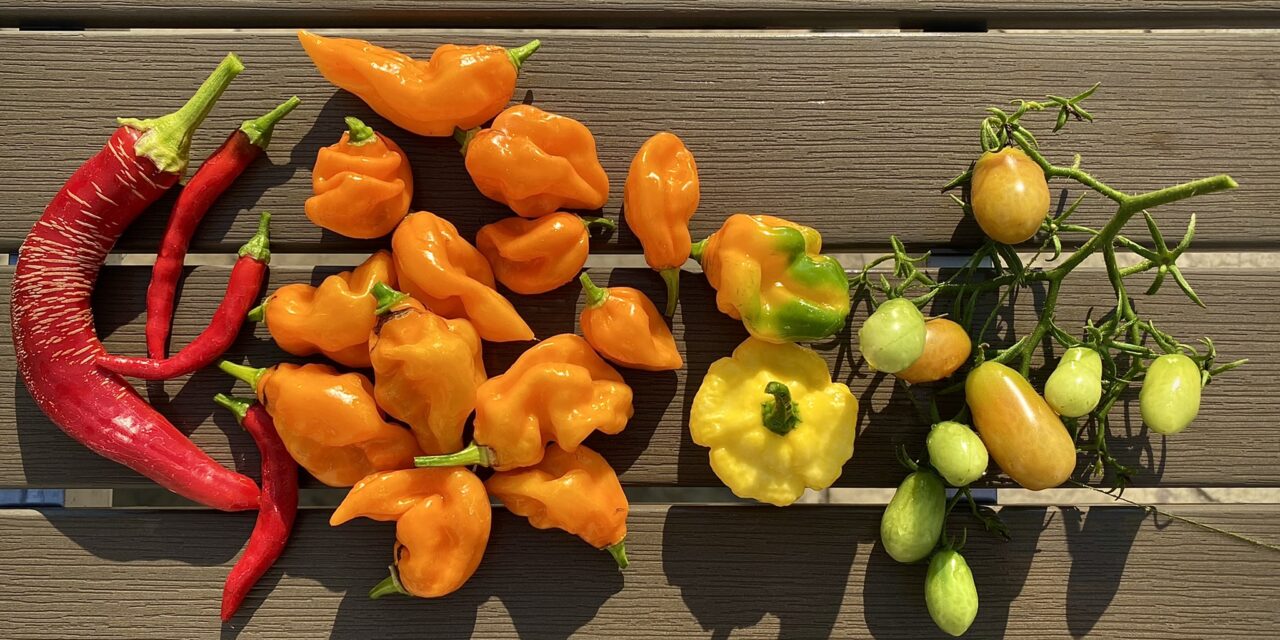

Hot Peppers
Hot peppers come in a sizzling array of flavors and heat levels, each one adding a unique spark to culinary creations. The Jalapeño, like the zesty sidekick of the pepper world, offers a moderate kick and a hint of smokiness that makes it a versatile addition to nachos and salsas alike. Moving up the Scoville scale, the serrano pepper brings more heat to the fiesta, boasting a lively and vibrant flavor that can turn up the heat on sauces and marinades. And then, there’s the fiery Habanero, a tiny but mighty powerhouse with a tropical twist that can transport taste buds to a Caribbean vacation… or an inferno, depending on your tolerance. But let’s not overlook the Ghost Pepper, a mythical creature that has daring souls walking the fine line between culinary heroics and self-inflicted mouth lava. And if that’s not enough, the Carolina Reaper enters the scene like a dragon breathing fire, reigning as one of the hottest peppers on the planet. These peppers aren’t just ingredients; they’re culinary challenges, daring enthusiasts to dance on the edge between delight and discomfort, flavor and flames.
Growing Peppers
1. Choose the Right Chili Pepper Varieties: Select chili pepper varieties that suit your taste preferences and growing conditions. Consider factors such as heat level, flavor, size, and color. Some popular varieties include Jalapeño, Habanero, Serrano, and Bell peppers.
2. Gather Supplies: Collect the necessary supplies, including:
- Chili pepper seeds
- Seed trays or small pots
- Seed starting mix or potting soil
- Watering can or spray bottle
- Transparent plastic wrap or a seed tray cover
- Grow lights or a sunny windowsill
- Fertilizer (optional)
3. Start Seeds Indoors: Chili peppers need a long growing season, so it’s best to start seeds indoors, especially if you live in a region with a shorter growing season. Fill seed trays or small pots with seed starting mix, which provides good drainage and aeration for young seedlings.
4. Plant the Seeds: Plant 2-3 seeds per pot about ¼ inch deep. Lightly cover the seeds with soil and gently press down to ensure good seed-to-soil contact.
5. Provide Proper Conditions: Place the seed trays in a warm and well-lit location. If you don’t have access to sufficient natural light, you can use grow lights to provide the necessary light spectrum for optimal growth. The ideal temperature for germination is around 75-85°F (24-29°C).
6. Maintain Moisture: Keep the soil consistently moist but not waterlogged. You can mist the soil surface with a spray bottle to avoid disturbing the seeds. Use a plastic wrap or a transparent seed tray cover to create a mini-greenhouse effect, which helps retain moisture and warmth.

7. Transplanting: Once the seedlings have developed a couple of true leaves and are strong enough to handle, usually after 6-8 weeks, they are ready to be transplanted into larger pots or directly into the garden. Choose a well-draining soil mix and ensure proper spacing between plants, as chili peppers can become quite bushy.
8. Harden Off: Before transplanting chili pepper seedlings outdoors, gradually expose them to outdoor conditions to prevent transplant shock. Start by placing them in a sheltered spot for a few hours each day, gradually increasing the time and exposure to direct sunlight over a week.
9. Planting Outdoors: Choose a sunny location in your garden with well-draining soil. Space the plants according to the recommended spacing for the specific chili pepper variety you’re growing. Water the plants well after transplanting and consider using mulch to help retain soil moisture.
10. Care and Maintenance:
- Water: Keep the soil consistently moist but not waterlogged. Water deeply when the top inch of soil feels dry.
- Fertilize: Feed your chili pepper plants with a balanced fertilizer once they start flowering and setting fruit.
- Support: As the plants grow and produce peppers, some varieties might benefit from staking or caging to prevent branches from breaking due to the weight of the fruit.
- Pest and Disease Management: Keep an eye out for pests like aphids and diseases like fungal infections. Use appropriate organic remedies to manage these issues.
11. Harvesting: Chili peppers typically mature 60 to 90 days after transplanting. Harvest the peppers when they reach the desired size and color. Use pruning shears or scissors to cut the peppers from the plant.
By following these steps and providing proper care, you can successfully grow chili peppers from seeds and enjoy a bountiful harvest of spicy delights.